 +1 (786) 209-1854



Setting up the Grandstream GXP1610 SIP phone
Grandstream GXP1610 is an easy-to-use IP phone for small and medium-sized businesses or home offices.
How to find your phone's IP address
Before you begin the setup located in the browser web interface, you need to connect the device to the internet and check the phone's IP address. By default, it obtains an IP address via DHCP (automatic IP address assignment).
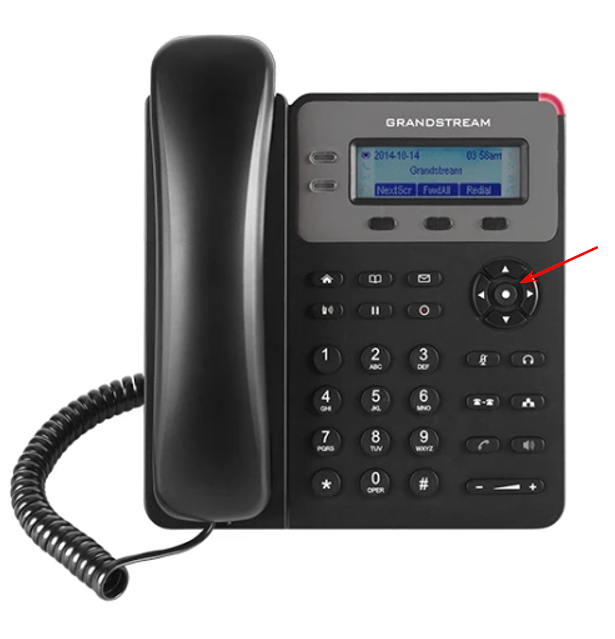
IMPORTANT! The phone and computer must be on the same local network.
-
Press the central button on the phone's "joystick" - Menu.
-
Go to the Status submenu.
-
Select Network status -> IPv4 and you will see the SIP phone's IP address. If you use a network with a static IP address, go to "Static IP settings" and enter your network parameters (the IP address to be assigned to the phone, the mask, gateway, and DNS).
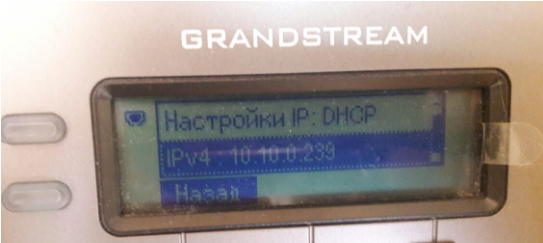
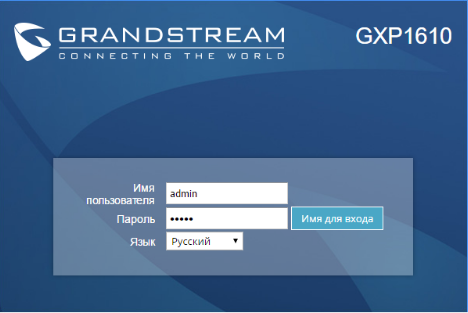
- Enter the obtained IP address in your browser's address bar and go to the login page. Enter the login and password; by default, in both cases it is admin*.
Setting up the SIP phone
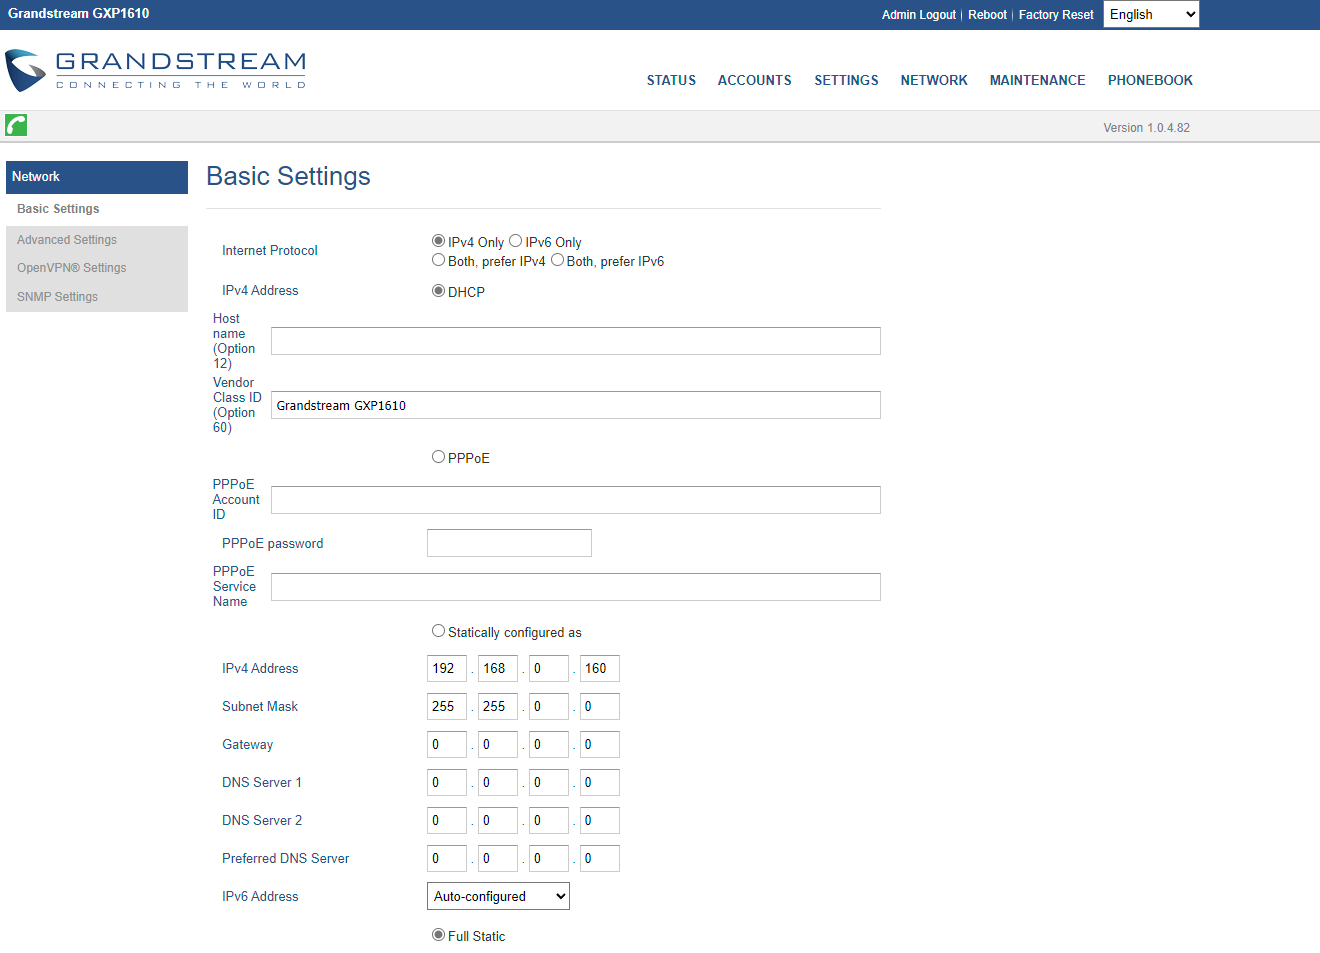
- After going to the phone interface, you will need to select Network - Basic Settings, make the settings and save:
- Internet Protocol - Preferably IPv4;
- IPv4 address - DHCP.
- Next, you need to specify the STUN server and port. Go to the Settings - General Settings section:
STUN server - stun.l.google.com:19302
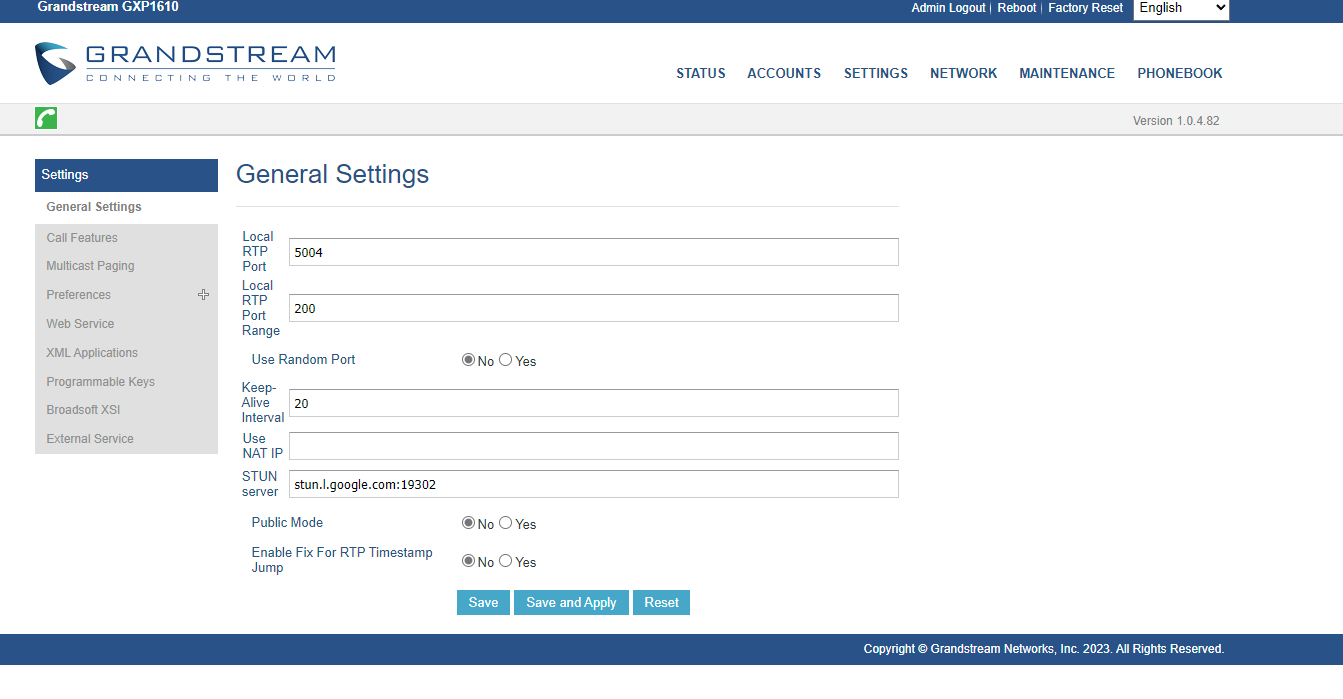
- Additionally, select Accounts - Account 1 - Network settings:
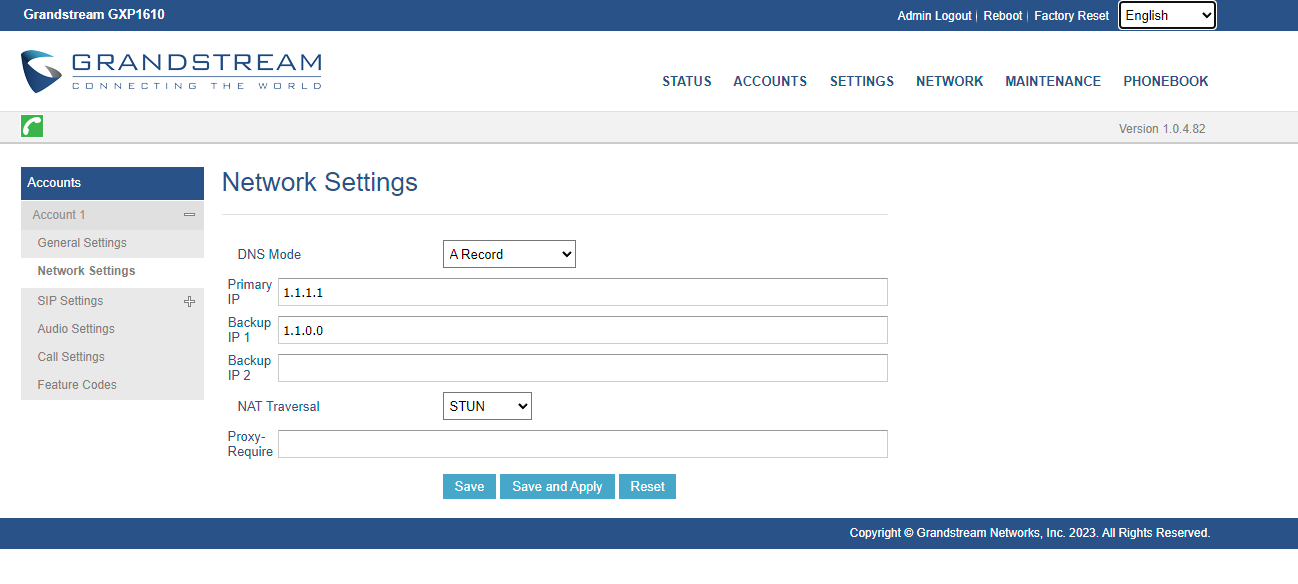
- DNS Mode: A Record;
- Primary IP: 1.1.1.1;
- Backup IP 1: 1.1.0.0;
- NAT Traversal: STUN;
- Proxy requirement - stun.l.google.com:19302
- After entering the network settings, you can proceed to adding the parameters for registering the SIP account. You need to go to Accounts - Account 1 - General and fill in the specified fields:
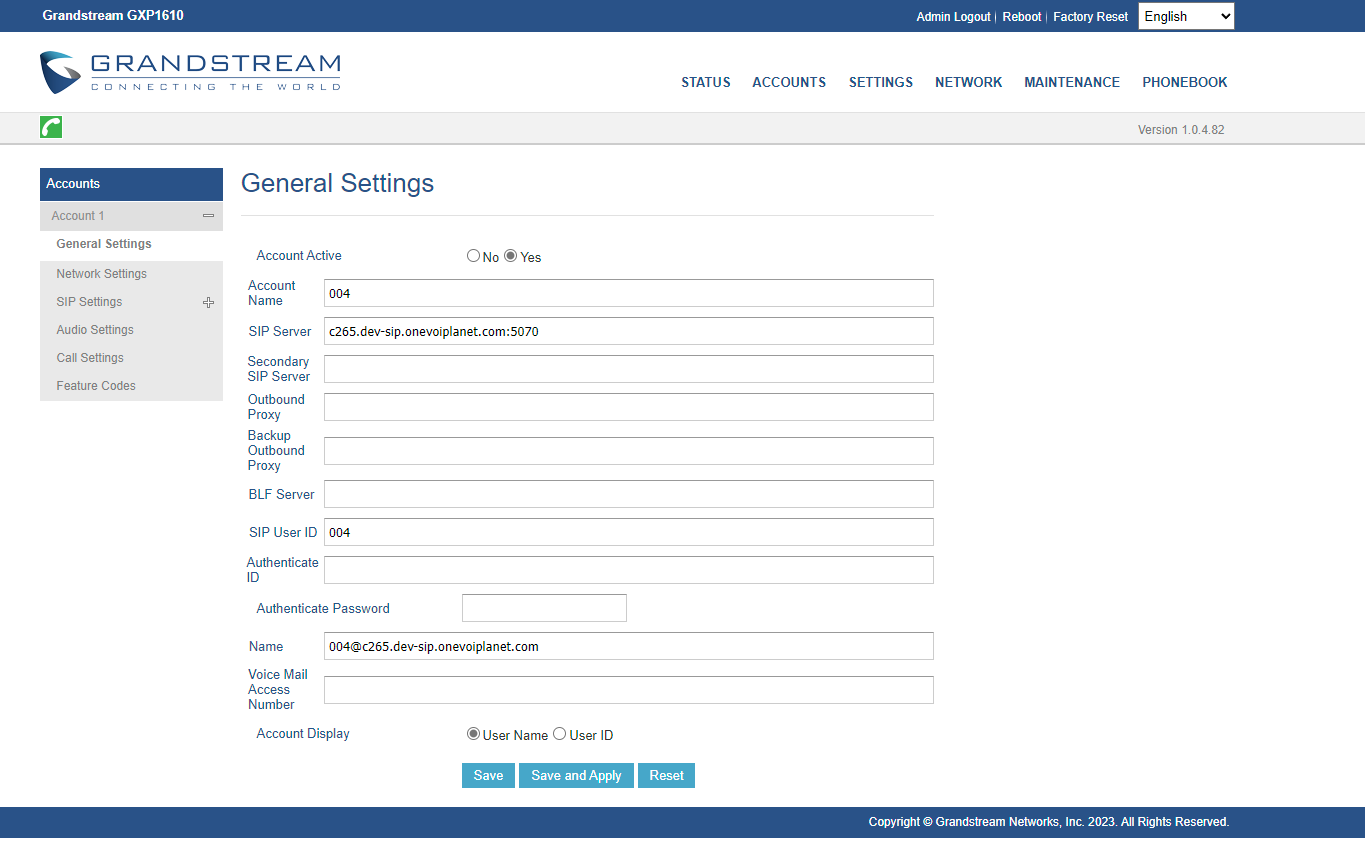
- Account active - Yes;
- Account name - the SIP account address;
- SIP server - the SIP domain specified in the employee settings (for example: c1.sip.onevoiplanet.com:5070);
Important! Specify port 5070 for connecting over UDP.
- SIP User ID - the SIP account address;
- Password - SIP Password;
- Name - the SIP account address + SIP server.
For example 004@c265.dev-sip.onevoiplanet.com
You can get this information from the employee settings.
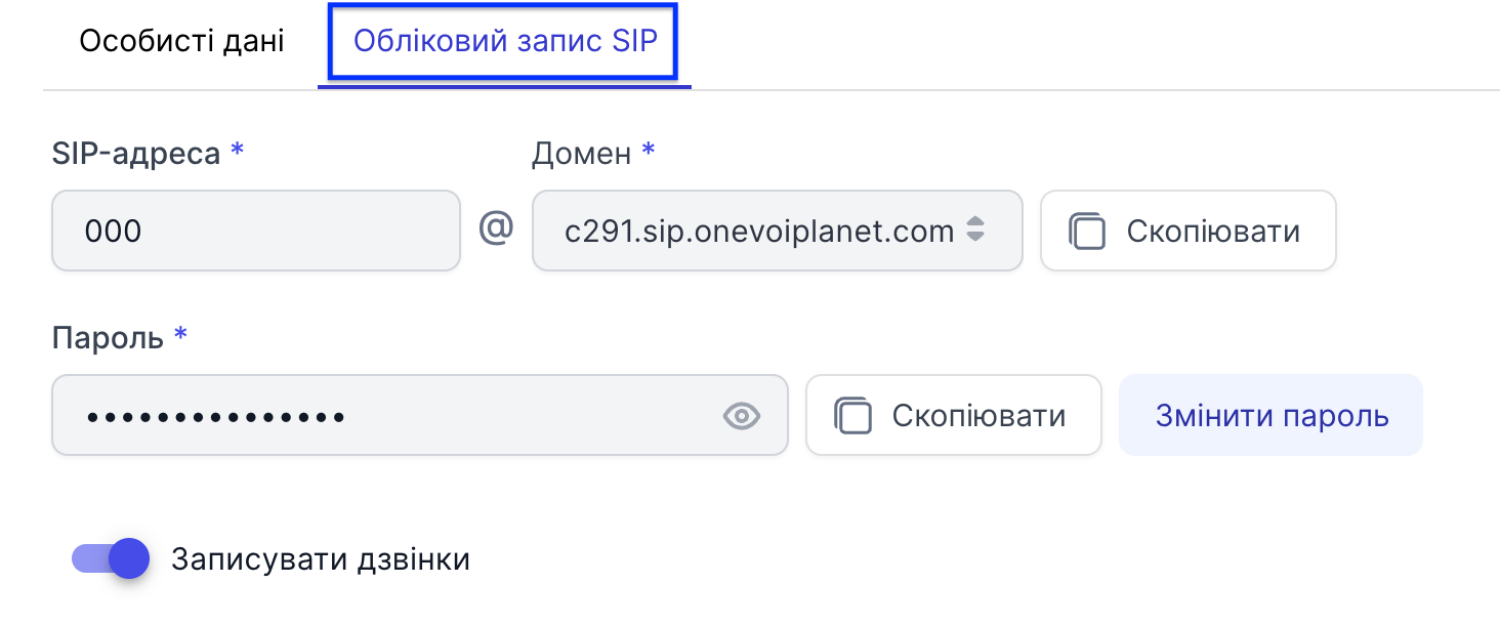
- After applying these settings, the phone should register with the OneVOIPlanet PBX.