+1 (786) 209-1854

Language: English
  • English
  • Українська
  • Русский
  • Polski
  • Deutsch
  • Français
  • Español
  • Português
  • Nederlands
  • Svenska
  • עברית
  • العربية
  • 中文
  • हिन्दी
  • Bahasa Indonesia
  • 日本語
  • Italiano
  • Türkçe
  • 한국어
  • Tiếng Việt
  • ქართული
  • Filipino
  • ไทย
  • Čeština
  • Română
  • Ελληνικά
  • Dansk
  • Norsk
  • Suomi
  • বাংলা
  • اردو
  • فارسی
  • Bahasa Melayu
  • தமிழ்
  • Azərbaycan
  • Հայերեն
  • Қазақша
  • Oʻzbekcha
  • Magyar
  • Български
  • Slovenčina
  • Hrvatski
  • Slovenščina
Language: English
  • English
  • Українська
  • Русский
  • Polski
  • Deutsch
  • Français
  • Español
  • Português
  • Nederlands
  • Svenska
  • עברית
  • العربية
  • 中文
  • हिन्दी
  • Bahasa Indonesia
  • 日本語
  • Italiano
  • Türkçe
  • 한국어
  • Tiếng Việt
  • ქართული
  • Filipino
  • ไทย
  • Čeština
  • Română
  • Ελληνικά
  • Dansk
  • Norsk
  • Suomi
  • বাংলা
  • اردو
  • فارسی
  • Bahasa Melayu
  • தமிழ்
  • Azərbaycan
  • Հայերեն
  • Қазақша
  • Oʻzbekcha
  • Magyar
  • Български
  • Slovenčina
  • Hrvatski
  • Slovenščina

Creating a SIP Trunk

How to create a SIP Trunk?

  1. Go to SIP settings

  1. Click SIP Trunks

  1. Click Add SIP Trunk

  1. In the Trunk name field, enter the trunk name

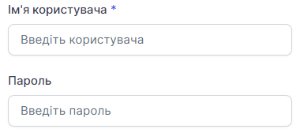
  1. In the Username field, specify the SIP address, for example 000. And in the Password field, specify the password of the current SIP.
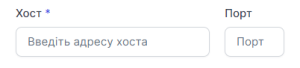
  1. In the Host field, enter the name of your host (domain), for example, c000.sip.onevoiplanet.com. You can also specify a port if needed
SIP account details can be found on the Editing an employee - SIP account page

  1. You can check the connection using the Check connection button

If the data is entered correctly, the connection status will change to Connected

  1. Activate the trunk using the toggle

The trunk is activated only through connecting an external number

Connecting an external number

  1. Click the Add button

The SIP Trunk has been added successfully